AccuTrack/AccuSQL: How to add Appointment Notes to New Appointment Notifications / Confirmations / Emails?
Step 1: From the System Admin screen, select the Set Appointment from the left-side of the screen and then Setup in the bottom-right.
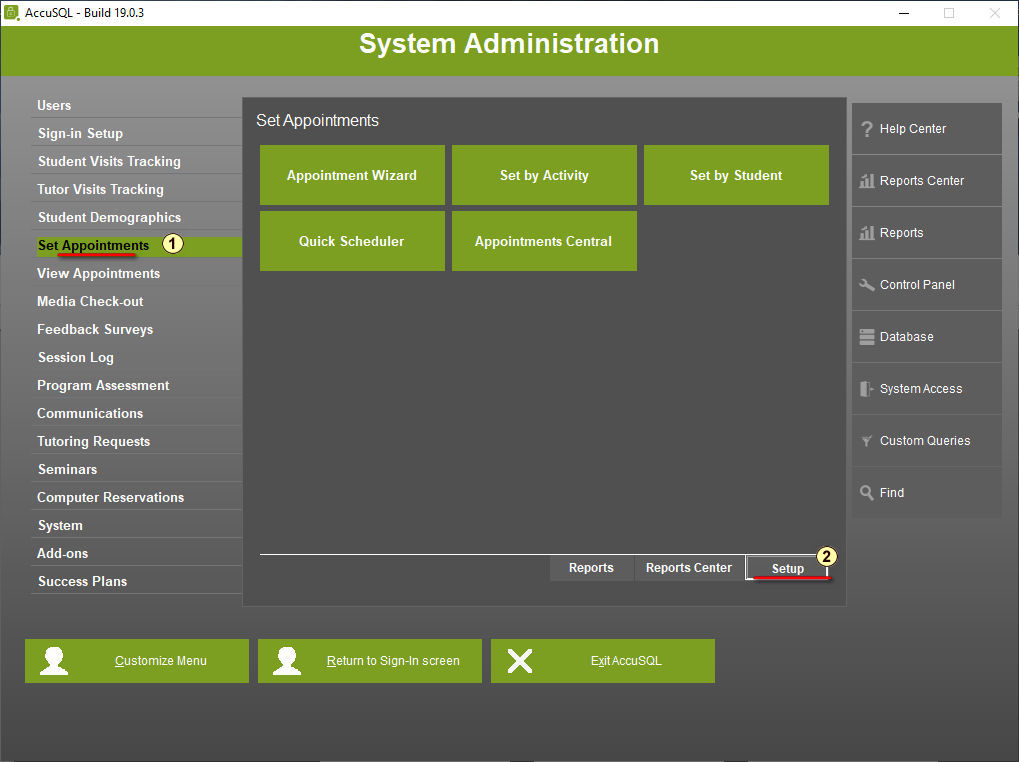
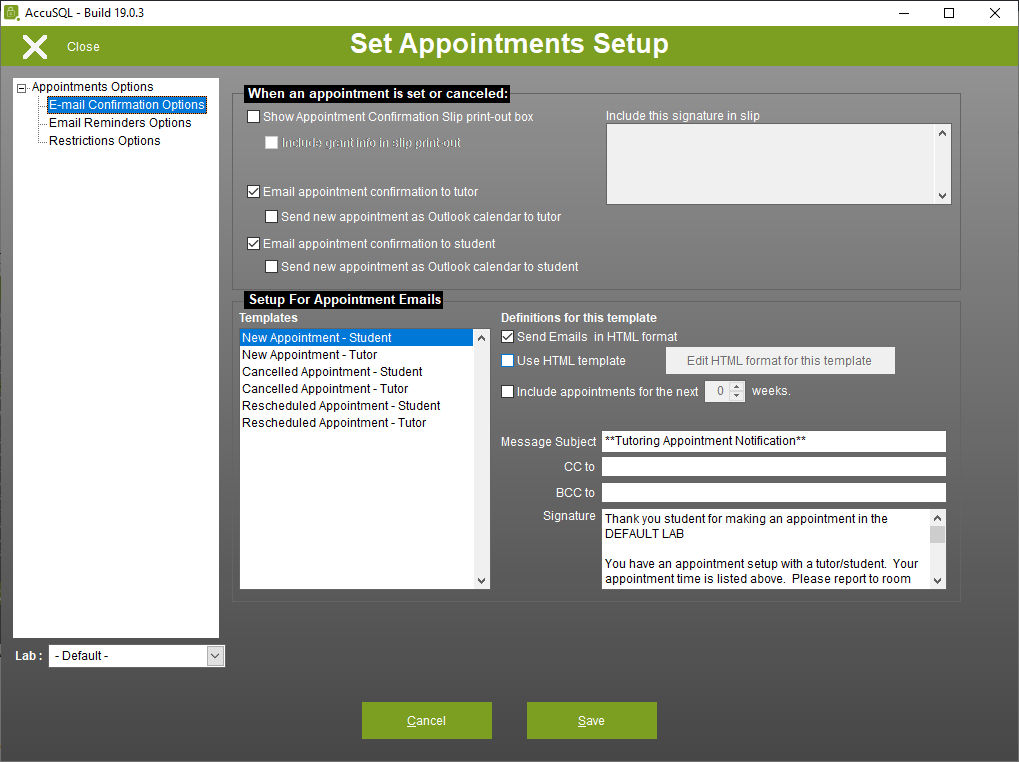
Step 2: Select the Email Confirmation Options under Appointment Options from the left-side menu.
Step 3: Select the New Appointment - Student from the Templates box, place a checkmark in the "Use HTML template" checkbox, and Click on the Edit HTML format for this template button
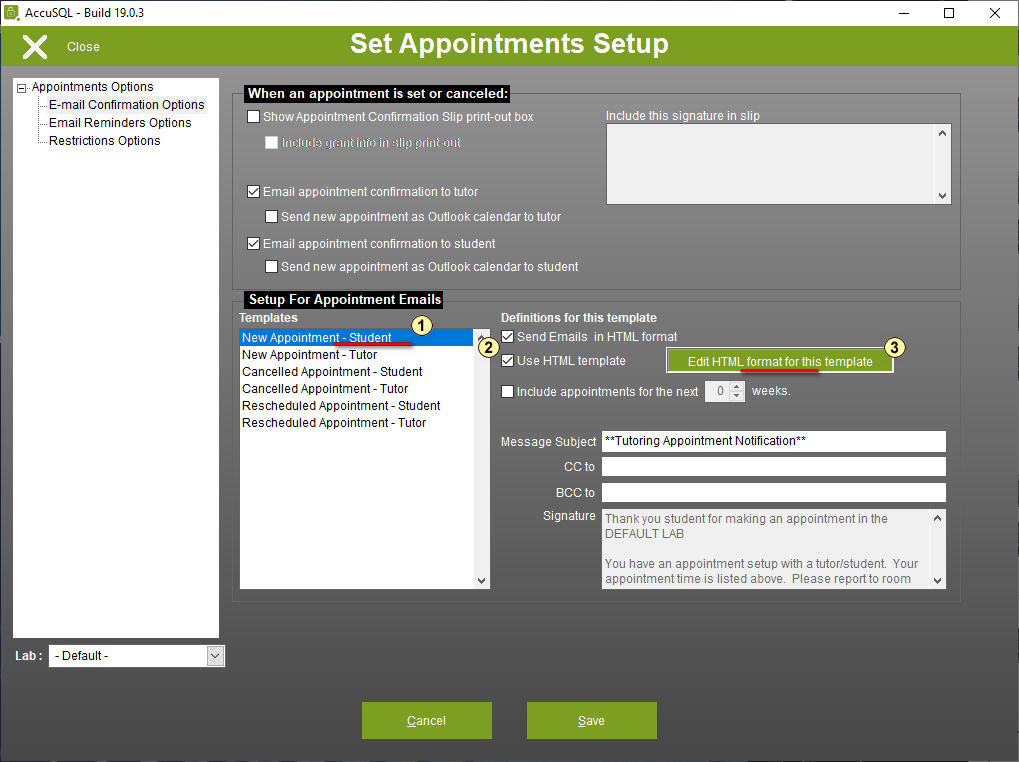
You may need to download the DHTML template editor from Microsoft if prompted:
https://www.microsoft.com/en-us/download/details.aspx?displaylang=en&id=8956
https://www.microsoft.com/en-us/download/details.aspx?displaylang=en&id=8956
Step 4: Expand the New Appointment(s) by clicking the + sign, then expand the New Appointment Members by clicking the + sign, and Select Notes from the options.
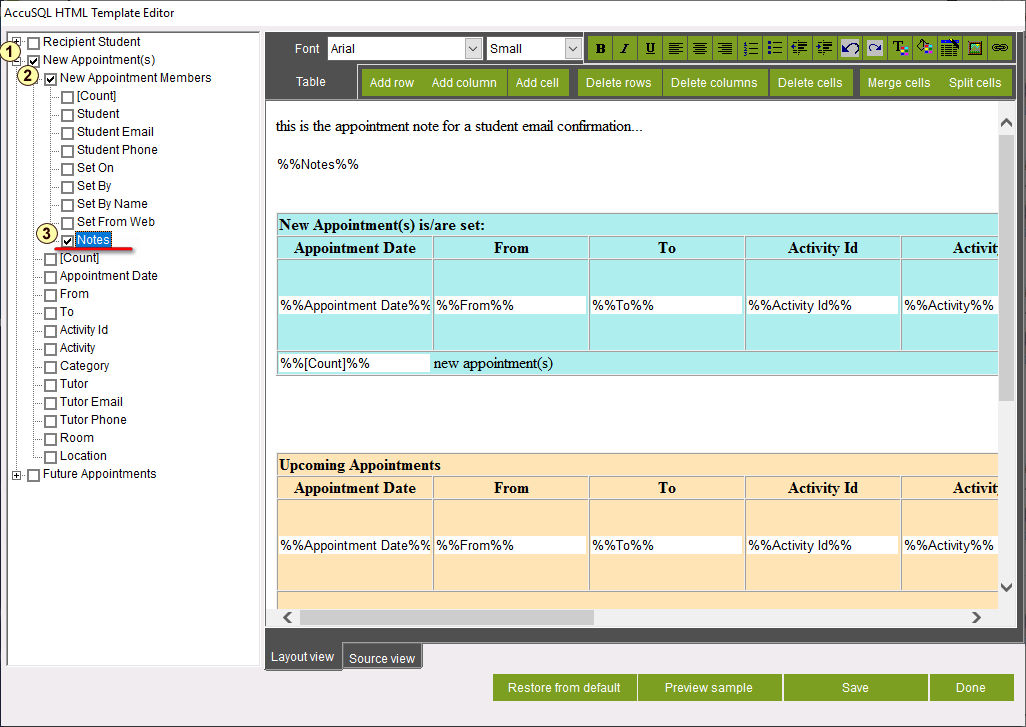
Step 5: Now click and drag the Notes field on the left-side navigation to the an area on the template that you would like Notes to appear. It should look like below:
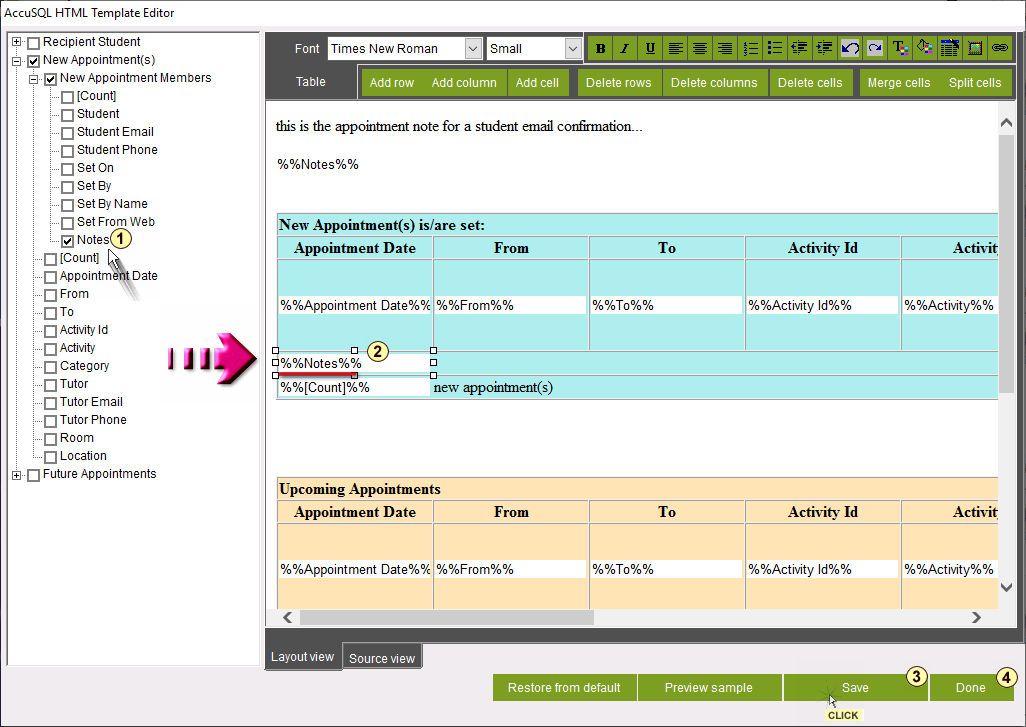
Step 6: Click the Save button (to save the template), click the Done button (to close this window), and click the Save button (again to save the use of the template setting).
Now simply repeat this process for all the templates that you want to update.
Related Articles
AccuTrack/AccuSQL: Why are my appointment confirmations not sending when I schedule an appointment in the software?
There can be several reasons that you may need to check with your IT/Network Support Team onsite as to why the mail server is not sending the emails out from AccuTrack/AccuSQL so this guide is for those that have exhausted those possibilities. Of ...AccuTrack/AccuSQL: How can I include the student's email on Email Confirmations to Tutors?
Log in with your Administrator credentials to AccuSQL. Next, click on the Set Appointments module on the left-side menu of the System Administration screen. Once there click on the Setup button in the lower-right corner of this section. Now on the ...Accudemia: How do I create a report of Appointment notes?
Introduction In Accudemia, Students and Tutors can place notes and attachments in the Appointments Management screen. A report can be created which sends individualized data to each user from this note. This article explains how to do this. NOTE: ...Accudemia: How can I add a new User to my account?
Intro This guide will show you how to find and update an existing user or create them from new. Step-by-Step 1. Login with your System Admin account at the https://*.accudemia.net website. Replace the * with your domain. 2. Click Administration > ...AccuTrack/AccuSQL: How to Change the Database Location
Method 1: Sign-in to the AccuSQL client as a system administrator and change the database location Step 1: Open AccuTrack/AccuSQL and log in with Admin credentials. Now, from the right-side menu of the System Administration screen, ...