Accudemia: How do I use the Schedule Report feature?
Introduction
Accudemia allows for the easy implementation of automated reports. Specific users or entire groups can be selected to receive specific reports on a daily, weekly, or monthly basis. This article will explain how to select these users and send them scheduled reports.
Step-by-Step
1. Click the Reports link on the home page. (Note that Admin will navigate to Data Analytics > Reports from the main menu)
2. Select a report from the list on the left side of the screen.
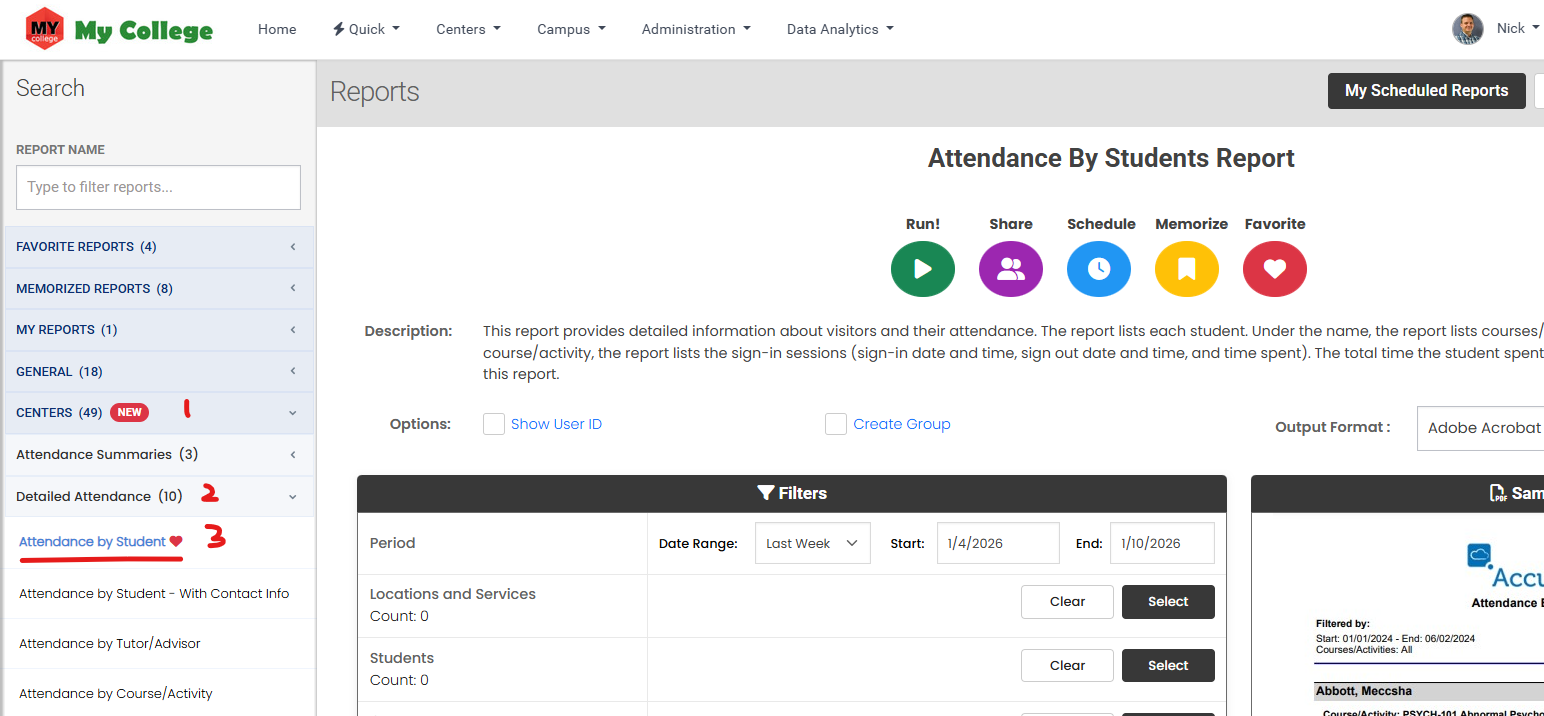
3. Complete all of the filter options you need for this report, including the period, students, etc., that you want included, then click the Schedule button.
4. Enter a title for the report related to the information on the report, like "Monthly Tutoring Center Visits" or "Weekly Visits for Sam Gamgee", etc.
5. Select the frequency at which the report will be sent out. You can choose from a daily, weekly, or monthly schedule for the report to run.
6. Choose the recipients of the report to be sent to your primary email address, specific emails (good for people not in Accudemia), specific people (who are in Accudemia as users), or an entire group of users, such as "All active tutors", "All active instructors", etc.
7. On the next step, choose to send the same report to all by leaving these "report options" unchecked, or if each one will get a personalized report filtered on their relevant data.

Note: If you selected to send this report to "all active instructors", "all active tutors", "all active students", or "Specific people" (from users in Accudemia), then you can choose that each one will get only data that pertains to them in the reports. It will send them each individualized reports with only their related data. This means that if an "instructor was selected" for that visit, then only that instructor sees the session log. Or in another scenario, only if the student who is the recipient of this report was recorded as attending the session, would they receive their Session information. This ensures that each recipient will not see other people's data, and get an individualized report of all their relevant appointments or session logs. Unlike the Admin version of the report, which shows all visits, this is what happens if these are left unchecked.
8. Review that all information is correct on the summary screen, and then click the Finish button.
Note: A confirmation message saying the report has been scheduled successfully should then appear.
You can now inform your recipients that they will get this report regularly.
Related Articles
Accudemia: How do I use the Schedule Report feature?
For the Updated Version of Accudemia 7.0 Click the link below: https://desk.zoho.com/portal/engineerica/kb/articles/accudemia-7-0-how-do-i-use-the-schedule-report-feature 1. Log into Accudemia. 2) Click Reports. 3) Click on the report you want to ...Accudemia: How do I send automatically generated work hour reports to tutors?
Introduction Automatically generated reports are a feature Accudemia offers to administrators. These can be created and sent to different groups of users on the college's account, like students, instructors, tutors, or more specific users. This ...Accudemia: How do I send scheduled reports with personalized assessments information to users?
Introduction In Accudemia, Administrators can create Assessment Forms that can be completed by the Tutors/Advisors for each visit in session logs. This article explains how to create personalized scheduled reports that will be sent out periodically ...AccuCampus Reports Guide
AccuCampus Reports Guide Event Reports To get to the reports related to events, from the Main Sidebar navigate to General > Reports. Event Registration and Attendance This report shows the registration and attendance information for a specific event ...Accudemia: How do I create groups using reports?
Introduction In Accudemia, there are several ways to create user groups: Using the "Create Groups" feature in certain reports. Via imports using ADX. Manually going through the Administration > User Groups module. However, this article will ...