Accudemia 7.0 - Did you know that you can now import restrictions or associations for your Center?
INTRODUCTION
In some cases, centers in Accudemia may need to restrict their students to only be allowed to see certain tutors or advisors when coming into their centers and this was not something you could do using the existing Tutor Schedules because students would see all available tutors based on the Service and Subject Area (course) selected. We realized that there was a need to limit these students to only one tutor so we added this ability under the
Administration > Restrictions
section of the main menu in Accudemia. Not only that restriction was added but we also gave you the ability to add another type of restriction/association that would limit the Subject Areas (courses) that would be displayed when a student selected a particular Service. These settings are great if you only have a few associations that need to be made then you can enter them manually. The real issue is when you are dealing with the entire student population and what advisors they should be assigned or maybe even if you have to assign the entire course catalog to a particular service like "writing tutoring" so we added the ability to import these associations or restrictions now using our ADX (Accudemia Data eXchange) import/export utility.
STEP-BY-STEP
Importing Associations/Restrictions
-
You can also use ADX (our import tool), which has been updated, to import those associations instead of doing it one by one. Start by downloading the software
here
, but if you already have the software simply update it when prompted.
-
Since the association is per Center, they will be created and imported only when you specify the center name in your import job. Now create an import CSV file including the minimum required fields:
-
For
Student-Staff Member Association
:
-
Center's Name
-
Student's ID
-
Tutor's ID (ADX doesn't load the accounts terminology, so it will be displayed as “Tutor” regardless of the terminology used for your staff.)
-
For
Service-Subject Area Association
:
-
Center's Name
-
Service Name
-
Course Code Prefix
-
Course Code
-
Now open ADX and log in using your Admin credentials (If you are using your school's SSO (Single Sign-On) portal this login would be the original login used prior because this software does not use your SSO credentials).
- Next, click the New Import Job button in the top-left menu.
 Create a New Import Job in ADX.
 - The import job wizard will open and click the Next button.
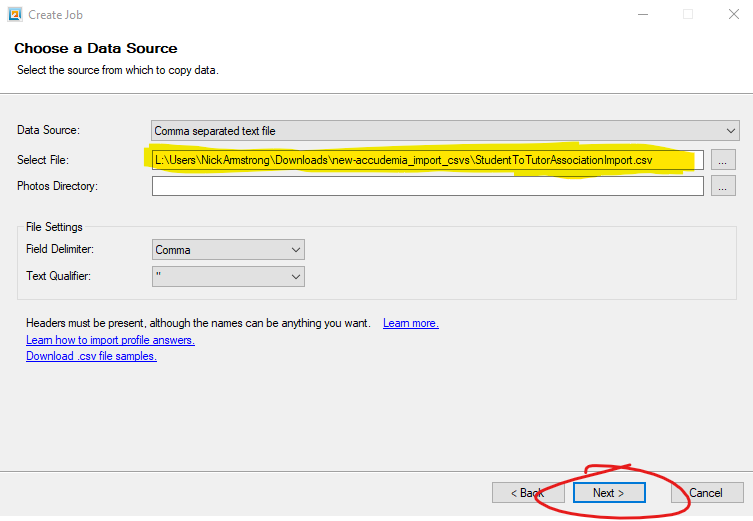
- Choose the file you want to import on this screen using the [...] button next to the "Select File" option:Once selected click the Next button.
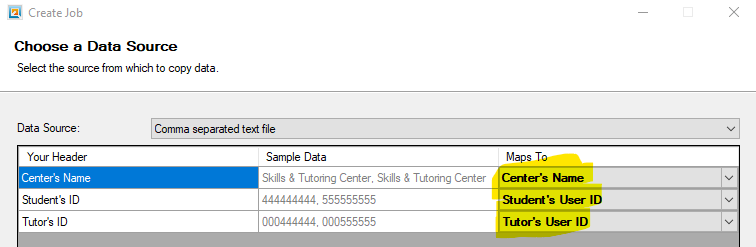
- Map the column's included in the import and click the Next button:
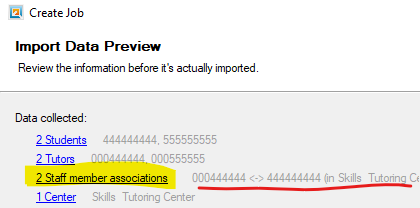
- You will get a summary of the number of associations found:
- Click the Next button twice, name the Import Job, and click the Finish button.
Note: This just creates the setup for the import to execute. - To create the new Associations in Accudemia simply click the Run Import Job Now! link on the import job you just created.
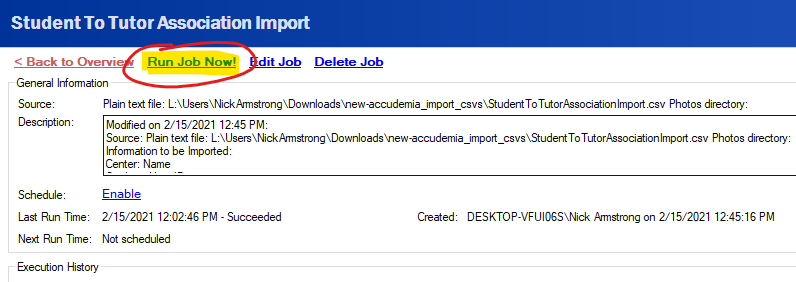
Note: If you have a lot of Import Jobs you may need to refresh the list on the left and find the one you just created.
Topic Participants
Level 2 (Support Mgr) Nick Armstrong